1.28.2011

Gladioulas Update

So a few weeks ago I put up this post - Gladiolus time.

Well, I thought I would let you know that my little bulbs are starting to sprout and I am SO EXCITED!!!  I got home from work last night and after playing with the dog for a few minutes I noticed a few little guys poking their way through...


(Ignore the green extension cord in this picture)  :)


HA!  There are 11 little sprout-lings total which is perfect for now.  I planted about 45 Gladiolas and a dozen or so Freesias.  They hopefully will bloom at slightly different times so I will have beautiful cut flowers in our home for a while. 

I love this time of year when it is beautiful outside, flowers finally grow without being scorched by the sun and you can enjoy yourself in the wonderful AZ "Winters."  Any big plans for the coming weekend?  I will probably be working on the backyard a little more and attending a baby shower for a great friend of mine.  Happy Friday!

1.27.2011

Laundry Room Makeover

So we were busy all weekend with a project I thought was going to be months and months down the road.   I was reading one of my daily blog visits, Young House Love, and saw they had a post about getting an AMAZING deal on a stack able front loading washer and dryer.  I have been going back and forth about wanting a front loading washer because I have read quite a few reviews about how they start to stink if you don't leave the door open.  Anyways, the fabulous deal they got really got me excited and so we set out to get the same great price. 

They found a great Whirlpool for $399 a piece at Lowe's PLUS an additional 20% off making the total for both $638!  What a steal!!!  They are normally priced at $599 a piece.  So Jason and I headed off to Lowe's trying to snag the same great deal... FAIL.  Lowe's must have smartened up because we went to three different Lowe's and called two others trying to finagle the additional 20%, which was a no go.  Well, $399 a piece is still a good deal.  But my Internet savvy husband then decided he liked a Samsung model better.  It was getting better overall reviews and after all of the research he did, I trusted his opinion that they were the better of the two.  The Samsung ones did qualify for the 20% off at Lowe's but still cost $479 a piece, we were getting WAY outside of the $638 I was originally planning on paying. 

Well, Jason found the Samsung washer and dryer set at Fry's Electronics for $454.  Not that much cheaper than Lowe's.  Well here is where things get good, Lowe's price matches AND my wonderful husband gets a military discount which brought the Samsung set down to $404!  We were definitely happy with that!  So, although we did not get the set for $638 we did get a $1200 set for $808.  They were delivered for free and we were SO happy!


Our old washer and dryer set is still in working order but we are running out of storage space in our house and have been wanting a stack-able for our laundry room since we moved in.  When we moved in there was no washer/dryer here so we found a set for $200 in great shape that worked perfectly.   (We did end up selling our old set for $100 so we really only paid $708 for the new set)

Before:


Old Washer with one shelf above it...


Old Dryer with two shelves above it which we tried to cram as much on as possible


So we thought if we could stack a new washer/dryer set it would free up more storage space which we always need.  So after we found our new little Samsung beauties we removed all of the crap from the laundry room... 


Tore out the old shelves....


Jason had to move the dryer vent to the other side but thankfully it was just some duct work in the attic.  We also patched all the holes from the old shelves and painted the laundry room a soft green color.  We used Edward Dunn - Green Tea but had it color matched to Lowe's Valspar paint.

(Not the best picture but it is a very subtle change.  Our kitchen is already a pretty bold color and we didn't want anything to compete with that.  We just wanted a light, clean color)

We then went back to Lowe's to find the least expensive shelving there was for the other side where the dryer used to be.  Let me tell you, it adds up QUICKLY!  We settled on wire shelving because it would be easiest to custom fit to our space.  The shelves themselves were very cheap but the brackets (at almost $9 each) added up quickly, even with Jason's military discount.  The total for the new shelving system was a little less than $200.00

We went from:

This                 to                 This


My shelves are now neatly organized with still plenty of room for other things and MUCH more room in our kitchen pantry:


So, here is the final look of our new laundry room and storage space:


Thoughts?!?!?

1.21.2011

Cooking a Turkey

So I thought I would change it up a little and add in my recipe for cooking a Turkey.  I mentioned that I would post about this around Thanksgiving but I just now got around to cooking the second turkey I had in my freezer.  Although cooking an entire turkey sounds a little scary, I promise it is a lot easier than you would think! 
 
#1 - you need to defrost your turkey.  There are two ways to thaw your turkey, in the refrigerator or by running cool water over it.
 
Refrigerator Method - It is most preferred but takes longer.  You will put your frozen turkey in the refrigerator, it takes about a day per 5 pounds of frozen turkey (my 10lb. turkey took two full days to thaw)
 
Cold Water Method - Submerge your frozen turkey (in its original wrapper) in cold water, it will take about 30 minutes per pound to defrost this way.  You should change your water every 30 minutes as well to make sure it is thawing properly.  This way is fast but make sure you cook your turkey immediately after it is thawed as bacteria can quickly grow.

#2 - You need to know how long to cook the thing.  Here is a chart for basic cooking time for your Turkey:

 (This chart is based on cooking your turkey at 325 degrees)

Weight of your Turkey
Roasting Time
(Unstuffed)(Stuffed)
10-18 lbs3-3.5 hours3.75-4.5 hours
18-22 lbs3.5-4 hours4.5-5 hours
22-24 lbs4-4.5 hours5-5.5 hours
24-29 lbs4.5-5 hours5.5-6.25 hours


You will Need:
  • Thawed Turkey
  • Chopped Onion
  • Garlic Cloves
  • 1 C. Dry White Wine
  • 3 - 4 Cans Chicken Broth
  • Butter
  • Salt, Pepper and Garlic Salt
 
Start off by preheating your oven to 325 degrees.  On to "Bird Prep"!
 
After she/he is all thawed you can open your turkey wrapper.  The worst part comes first, removing all of the "goodies."  First up, the gravy pouch/ neck bone/ etc. in between the ol' birds legs.  Reach your hand right on in there and pull that stuff out.


Nice and Clean now...


Next up, flip your turkey around and lift the neck flap... there will probably be some goodies in there for you as well.  I know this is not much fun, but way better to find it now than when you are carving your turkey!


I toss all of this stuff but I am sure there are great ways to cook it and people who will eat it, the choice is yours!  Alright, time to rinse your bird!  Just gently rinse the turkey, even the cavities and then pat dry with a paper towel.


Next, coat your turkey with a nice amount of butter


I then generously sprinkle with Salt, Pepper, and Garlic Powder
(Or you can use your Garlic Seasoning)


Chop up a whole onion coarsely and a peel a few cloves of garlic.  (This was a pretty small turkey so I didn't use as much as normal)


 Put your buttered turkey in a roasting pan.  ***If you put your turkey in the pan breast side down and cook for 45 minutes and then flip to breast side up you will end up with an incredibly moist turkey.  I did it with the 29 pounder from Friendsgiving but got lazy with this small guy.  It is a new trick I learned and thought you all might want to know***  

I then loosely stuff the turkey with most of the onions and garlic and then sprinkle a little in the pan.  I also add 1 Cup of white wine and enough low sodium Chicken Broth to just touch the bottom of the  turkey.  (my pan has a roasting rack so the turkey sits off the bottom of the pan)  I added about 3 cans of chicken broth.


 Now I knew this bird was going to cook quickly so I jumped the gun a little on this next step.  Usually, I put the turkey breast side down and cook for about 45 minutes.  I then flip the bird and cover the wings in foil.  OR if you are cooking breast side up the entire time, cover the wings as soon as they begin to brown.  I was being lazy (like I mentioned earlier) so I covered the wings right from the get go and they cooked beautifully.


Throw your turkey in your preheated oven and cook for 30 - 45 minutes.   Baste about every 30 minutes throughout your cooking time.  When the breast of your turkey begins to brown, make a little foil tent...


And throw that on top of the browning turkey breast.  This will allow the turkey to still cook but will slow down the browning process so the skin doesn't burn.


Your turkey is done when the internal temperature near the thigh bone reaches 165 degrees.  I always check the temperature over trusting the pop-up button.  (It usually gets butter on it and doesn't always pop even though the turkey is fully cooked)  Make sure you do not hit bone when you are checking the temp though, it will cause your thermometer to read high.


Pull your turkey out of the oven and allow it to rest for 20 - 30 minutes before carving.  (This will allow some of the juices to make their way into the meat leaving everything nice and juicy!)


Sorry, I didn't take very good pictures of the finished turkey.  It was 9:00pm and we still had not eaten dinner so we were a little impatient when this guy was ready.  Anyways, I promise cooking a turkey is not scary and makes for some great meals with leftovers as well!  Follow your cooking times and trust your meat thermometer.

Enjoy!  

1.19.2011

Family Room/ Dining Room Reveal

So I keep meaning to finish the Home Tour but get distracted with other projects, three day weekends, and easy food posts.  Finally I am sitting down to post about the remainder of our house, and if you remember the Before pictures, it should be a great reveal!   Let's start with the before pictures of our Family Room/ Dining Room.  Remember, there is no need to adjust the color on your monitor... these are actually the colors the old owner chose!

Our Home 2008:


Ignore the random dark tile laying.  We had just bought that and were trying to figure out the layout for when we started on the flooring.


Our red dining room...


Look at that color scheme, there really are no words!  :)


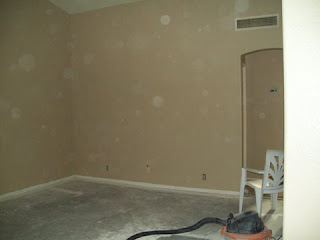
So the first night Jason sucessfully removed the old carpet from the family room and the tile from the laundry room.  My mom and great friend Teresa came over and we painted and painted and painted some more.  To start we had to prime the walls that were orange.  Unfortunately they used either high gloss paint or an oil based paint so the primer started running off of the walls.  It was a terribly long process.  I figured out that we needed a few very thin coats of primer for it to stick.  Then we went to town painting almost every wall tan, except the wall with the fireplace.   We were determined to get all of the painting done that night, which we proudly did!  We didn't finish until almost 2am.  My mom then picked up the chisel and we began removing the kitchen tile.  We got the kitchen completely but called it quits at the dining room/ stroke of 4am.   I was extremely proud of what we had accomplished.  We were going shopping for my wedding dress the next day though so I thought some sleep might be nice.

Here is where we left things:


Yup, dog in the middle of everything like usual...


This accent wall did not end up being the color I was hoping for.  (Looked kind of poop brown-ish)  So I repainted a day or so later to a dark Olive green color.

For the next few days Jason, his dad and my brother worked to remove the remaining tile in the kitchen and dining room.  There was dust EVERYWHERE...


 So from here we layed the new tile which is the dark 18" X 18" tile you keep seeing in pictures.  We borrowed Teresa's couch and put out any furniture we could find on the cheap.  In the past two years our house has slowly been pulled together with great finds, lots of saving, and buying only when we could actually afford things.  I love our house and am so happy to live there with my adorable husband.  We still have projects we want to do but it feels nice to have our Family room to our liking! 

Here is what it looks like now:


Yes, the dog could not help but sit in for most of these pictures.  (I was either attempt to shoot around her and likely get pictures containing dog butt or have her "sit pretty" for the photo shoot)


We got the chairs from Costco for about $250


We found the couch at a warehouse sale.  They sold furniture from model homes and we scored this sectional for $350!  We got the big picture from Ikea.  It came with a silver frame that just got lost on the wall so I painted it dark brown and voila, love it.  The throw pillows are from Ross ($6 for the pair) and the coffee table and rug are other Ikea finds.


Our TV stand and two towers came from Target and the fun new orchid in the corner was a Lowe's purchase about two weeks ago.  (I don't have the greatest track record with orchids so I don't expect it to last too long)


Dining Room:


This buffet was a wedding present from some of my closest girlfriends.


The dining room table my mom bought for us, she got it (along with the four chairs) at St. Vincent de Paul for $75!


Lets Compare:


 So... Thoughts?
Related Posts Plugin for WordPress, Blogger...